Blending makeup has never been easier since the invention of the beauty sponge. These small and mighty wonders are bouncing their way to the top and giving go-to brushes some major competition. Sponges are not only great for a flawless foundation application. There is more than meets the eye with these handy tools. Skin care and makeup professionals can incorporate this must-have into their services and homecare recommendations by first understanding the benefits of different styles of sponges, how to use them, and best methods for keeping them clean.
No size fits all
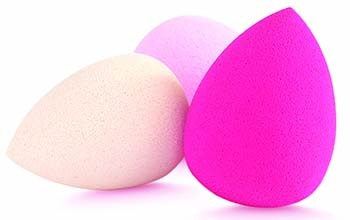
Sponges come in various shapes and sizes. Understand and teach clients the importance of tool texture and size. Some sponges are soft and bouncy, while others can be firm and dense. Firmness and density directly impact how the sponge picks up and deposits product. Also, remember that size matters based on the application area. Talk options to find the right fit for clients and their needs. Shape is equally important. The classic sponge has become a staple among makeup artists.
If a client is craving contour, a sponge that has some edge to it is useful. A chiseled, straight-edge will help map out the contour and create a dramatic line. Flip it over and the point helps blend everything together for a seamless, stunning look. Edges of sponges are also great for fitting into the corners of the face and under the eyes, and for applying concealer and powders. Use the point to help cover any acne or imperfections.
Clients may be looking for coverage options. A sponge that has a big base and smooth curves is best in this case. Based on how the sponge is held, different levels of coverage can be achieved for each client. Cup the base in the palm of the hand for more coverage and bounce. Hold the sponge midway for medium coverage. The tip is effective for natural, under-eye application and getting into those hard-to-reach areas.
If a client is more advanced in makeup application, recommend a sponge that addresses more than just complexion. A sponge with a small, pointed tip and big base is great for detailed application of products under the eyes, as well as overall complexion.
 Additional perks
In addition to applying makeup, sponges are great for cleanup. Mistakes happen. Sponges can be used to simply erase anywhere makeup may have been applied using a heavy hand. Any fallout can be blended away using a dry sponge.
A sponge that features a small, prominent point can also be used on the cheeks. Using the very edge of the tip, pick up a cream blush or liquid lipstick color and apply. Flip over the sponge and use the end – sans product – to blend and create a flawless cheek stain.
Simple sanitation
Like any makeup tool, properly cleaning the sponge is important. And, luckily, sponges are very easy to clean. Just wash with a gentle soap and warm water. Squeeze a few times to rinse and let dry. Be sure to show clients how to clean their sponges effectively, as well.
The world of sponges can be intimidating at first, but knowledge is power. As professionals learn how to use sponges effectively, they will also be able to confidently teach and recommend these great tools to clients.